A customized paver patio is a simple way to take your basic front or back yard, and turn it into an extension of your living space. Outdoor pavers work in a unique way to create your own style with a range of personalized designs, patterns, and features. Today, it is possible to take on the installation process of paving stones yourself. All you need is this easy-to-follow 5-step beginners’ guide for how to build a paver patio. If you need any additional support building a pavers patio by yourself – you are at the right place.
What is a Paver Patio?
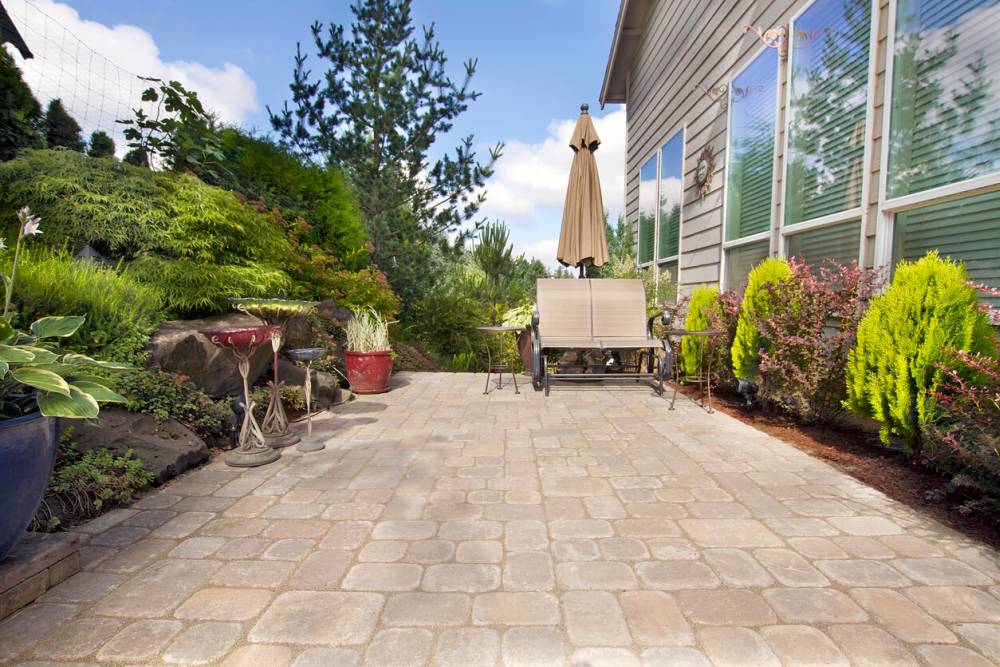
A paver patio is more than just a paved walkway, driveway, or yard feature. It includes a variety of pavers that may look like stones, rocks, or even bricks. The material is prepared, and installed after a base is set. A paver patio base usually includes 6’ of gravel paver base, 1” – 2” of sand, as well as spacers, and jointing. Once the base is set, you can begin to implement the type of design you want. Paver patio patterns include jack-on-jack, running bond, herringbone, and even pinwheel patterns that you can create alone, or with a team of professionals.
5-Step Beginners’ Guide on How To Design a Paver Patio
Use this easy-to-follow guide to building a DIY pavers patio. The simple 5-step process is ideal for building a patio you love, that also shows off your personal style.
- Prepare the Area
Make markings to create a layout. Then, use strings, and batter boards to create furring strips, with a cross piece to support the strings. Do not worry about making it perfect because you can use the cross pieces to adjust the layout as you go.
- Install the Foundation
Create a paver base from gravel or sand. Then use it to lay a 2” – 3” base layer. Wet the foundation, and then use a plate compactor to compress the base. Continue the process until you have a 6” base with a solid pack, and a uniform slope. NOTE: Always check the depth and slope before laying the pavers.
- Lay the Pavers
When you have a solid 6-inch base, you can create a unique paver patio design. Start by laying pavers along the edge, and then continue through your layout. Work inward from the outer perimeter, and then continue to install the pavers from the edging. Check the tops, and sides periodically to ensure that all of the pavers are in place, and maintained along the edges through every foot.
- Add Joint Sand
The finishing sand is an elemental part of DIY paver patios. Add the sand to the top of the blocks after you have secured the placement and tapped the blocks down. You can sweep the sand over the top of the pavers to fill any uneven spots, and fill in the joints. Using a temper to settle the sand, repeat the filling process as needed. Then remove any lingering excess sand with a broom or leaf blower with attention to crevices and corners. Spray the entire area with a hose, and then allow the sand to cure for at least 24 hours.
- Finish & Add Final Touches
You can add the finishing touches to your paver patio during this step. Once you use filler sand to close up any gaps in the paver patio, you can complete the job by polishing up the top of the pavers. Additionally, you may decide to add color, dress up the space with features, lighting, and landscaping, or even use seasonal accents like mulch, or heaters.
DIY home improvements can seem like they are too much to take on alone. However, with this 5-step beginners’ guide on how to build a patio, you can have a custom outdoor space to be proud of. A unique paver patio design may require additional support from professionals to answer questions, help you through this how-to pavers guide, or even offer extra resources. Call Cricket Pavers today to talk to a professional patio paver team.