Embarking on a patio installation project can transform your outdoor living space, creating a beautiful and functional area for relaxation and entertainment. From selecting the right materials to planning the layout and executing the construction, there are crucial steps to follow for a successful outcome.
In this guide, Cricket Pavers want to share 5 essential steps that homeowners in South Florida should consider when undertaking a patio installation project, providing expert advice and detailed insights to ensure a seamless and satisfying experience.
Step 1: Designing Your Dream Patio
Tailoring Patio Design to Your Lifestyle
When designing your dream patio, it’s essential to consider how it will fit into your lifestyle. Think about the primary activities you plan to enjoy in this space. Are you envisioning cozy family gatherings, lively summer barbecues, or tranquil evenings with a book? The design should accommodate these activities. For instance, if you love hosting parties, incorporate ample seating and dining areas.
If relaxation is your goal, consider comfortable lounge furniture and perhaps a fire pit. Additionally, pay attention to lighting and shading options to ensure comfort throughout the day and into the evening. Customizing the design to your habits and preferences will make the patio a truly functional and enjoyable extension of your home.
Material Selection: Travertine, Concrete, or Pavers
Choosing the right material for your patio is crucial for both aesthetics and functionality. Travertine is a popular choice in South Florida due to its natural look and cool surface, perfect for hot climates. Its durability and resistance to temperature changes make it an excellent option for outdoor spaces. Concrete offers versatility and cost-effectiveness. It can be stamped or stained to mimic other materials, providing a range of design possibilities.
Pavers, on the other hand, offer a classic look with a variety of colors and patterns. They are also easy to repair, as individual pavers can be replaced without disturbing the surrounding area. Each material has its unique benefits, so consider your budget, maintenance preferences, and style when making a selection. The right choice will enhance your patio’s beauty and longevity.
Step 2: Pre-Installation Essentials
Assessing Your Space: Driveway and Patio Synergy
Before installation begins, it’s important to assess the synergy between your driveway and your new patio. The two areas should complement each other in terms of design and functionality. Consider the flow of traffic between the driveway and the patio, ensuring there is a seamless transition.
Matching or coordinating materials can enhance visual harmony and increase curb appeal. For example, using the same type of pavers for both the patio and the driveway can create a cohesive look.
Additionally, think about the practicality of the layout. Is there enough space for vehicles and outdoor furniture? Proper planning in this stage can prevent future inconveniences and enhance the overall usability of your outdoor space. By paying attention to these details, you can create a harmonious and functional outdoor environment that boosts your home’s overall appeal.
Securing Permits and Preparing the Site
Securing the necessary permits is a crucial step in any patio installation project. Local regulations in South Florida often require permits for patio construction, so it’s important to check with your local building department. Obtaining the correct permits ensures that your project complies with zoning laws and building codes, preventing potential legal issues down the road.
Once the permits are secured, site preparation can begin. This involves clearing the area of any existing structures, debris, or vegetation. Proper grading is essential to ensure adequate drainage and prevent water pooling, which can damage your patio over time. Mark the layout with stakes and string to visualize the final design and make any necessary adjustments.
Taking these steps ensures that the foundation is solid and ready for construction, paving the way for a successful patio installation. Careful preparation at this stage sets the tone for a smooth and efficient project.
Step 3: The Installation Process
Laying the Foundation: Concrete Pads and Prep
Laying a solid foundation is critical for the durability and longevity of your patio. Start by preparing the ground where the concrete pads will be placed. This involves excavating the soil to the required depth and ensuring the base is level. Next, lay a layer of gravel to facilitate drainage and provide additional stability. Compact the gravel thoroughly to create a firm base.
Once the ground is prepared, you can pour the concrete pads. Use formwork to outline the shape and size of the pads, ensuring they align with your design plan. Pour the concrete and use a trowel to smooth the surface.
Allow the concrete to cure completely before proceeding with the next steps. Properly laid concrete pads provide a strong and stable foundation, preventing future issues such as sinking or cracking. This foundational work is essential for a successful patio installation, ensuring your outdoor space remains beautiful and functional for years to come.

Paver Installation: Precision and Professionalism
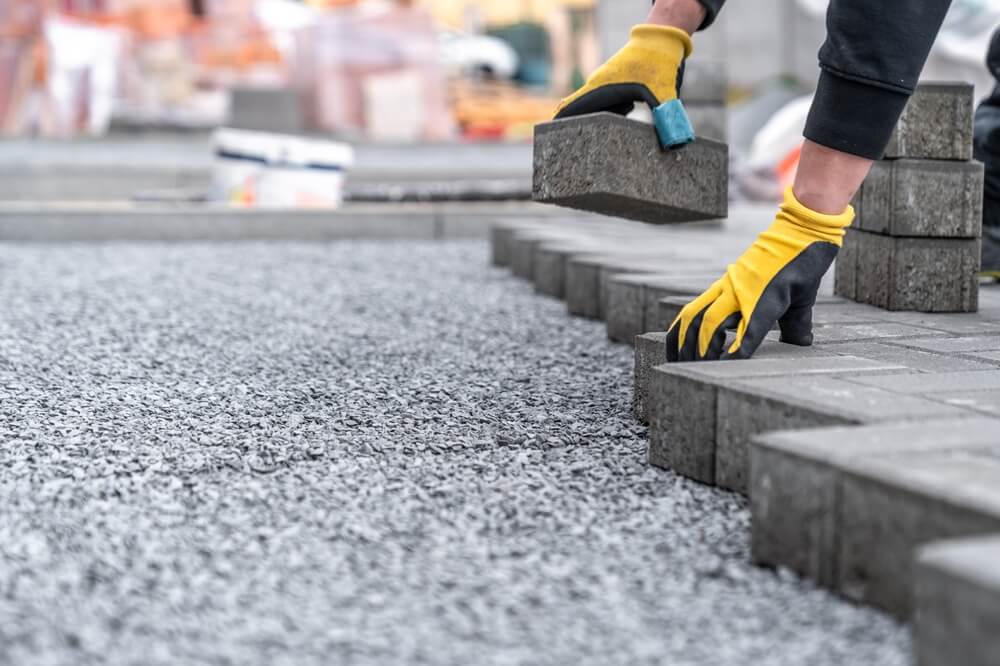
Installing pavers requires a high level of precision and professionalism to achieve a flawless finish. Begin by laying a layer of sand over the concrete pads, creating a smooth, level surface for the pavers. Carefully place each paver according to your design pattern, ensuring consistent spacing and alignment. Use a rubber mallet to gently tap the pavers into place, making sure they are securely seated.
Attention to detail is crucial during this process. Regularly check for levelness and make adjustments as needed to maintain a uniform surface. Once all the pavers are in place, spread a layer of sand over the entire area and use a broom to work it into the joints. This helps to lock the pavers in place and provides additional stability.
Professionalism in paver installation not only enhances the aesthetic appeal of your patio but also ensures its durability and longevity. A meticulously installed patio will withstand the test of time and provide a beautiful, functional space for years to come.
Step 4: Custom Features and Enhancements
Integrating Outdoor Kitchens and Pergolas
Integrating custom features like outdoor kitchens and pergolas can significantly enhance your patio’s functionality and appeal. An outdoor kitchen allows for seamless entertaining and dining, making it a perfect addition for those who love to host gatherings. When planning an outdoor kitchen, consider including essential elements such as a grill, countertops, and storage space. Opt for weather-resistant materials to ensure durability and ease of maintenance.
Pergolas add both style and practicality to your patio. They provide much-needed shade, making your outdoor space more comfortable during the hot South Florida afternoons. Pergolas can also serve as a framework for climbing plants, adding a touch of natural beauty to your patio. When designing a pergola, choose materials that complement your patio’s overall aesthetic and ensure it is structurally sound.
By incorporating these custom features, you can create a versatile and inviting outdoor living space tailored to your lifestyle and preferences.
Pool Deck Integration: Pavers and Marble
Integrating your patio with a pool deck can create a seamless and luxurious outdoor oasis. Pavers and marble are excellent choices for this integration due to their durability and aesthetic appeal. Pavers offer versatility in design, allowing for various patterns and colors that can complement your patio and pool area. They are also slip-resistant, making them a safe option for wet areas.
Marble, on the other hand, provides a touch of elegance and cools down quickly, which is ideal for hot South Florida climates. Its natural beauty and smooth texture make it a popular choice for upscale pool decks. When integrating these materials, consider the overall flow and harmony between the patio and pool deck. Ensure that the materials are properly sealed to withstand the elements and prevent any potential damage.
By carefully selecting and integrating pavers and marble, you can create a cohesive and stunning outdoor space that enhances both functionality and visual appeal.
Step 5: Post-Installation Care and Maintenance
Protecting Your Investment: Sealing and Weatherproofing
Protecting your newly installed patio is essential to ensure its longevity and maintain its appearance. Sealing the surface is a crucial step in this process. A high-quality sealant will protect your patio from moisture, stains, and UV damage. This is particularly important in South Florida, where heavy rains and intense sun can take a toll on outdoor surfaces.
Weatherproofing goes hand-in-hand with sealing. Ensure that all materials used, especially wood in pergolas or outdoor furniture, are treated to resist the elements. Regularly check for any signs of wear or damage and address them promptly to prevent further deterioration.
Applying a sealant every few years and conducting routine maintenance can keep your patio looking pristine and functioning well for years. By investing in sealing and weatherproofing, you protect your outdoor living space from the harsh elements, ensuring it remains a beautiful and enjoyable part of your home.
Routine Maintenance: Ensuring Longevity and Beauty
Routine maintenance is key to preserving the longevity and beauty of your patio. Regular cleaning is the first step. Sweep away debris like leaves and dirt to prevent stains and mold growth. For deeper cleaning, use a mild detergent and water to scrub the surface, paying special attention to any stained areas. Pressure washing can also be effective but should be done carefully to avoid damaging the materials.
Inspect your patio periodically for any signs of wear, such as loose pavers or cracks. Address these issues promptly to prevent them from worsening. If you have wooden elements like pergolas or outdoor furniture, reapply protective coatings as needed to guard against the elements.
Regularly tending to your patio not only keeps it looking its best but also extends its lifespan. By dedicating time to routine maintenance, you ensure that your outdoor living space remains a delightful and functional area for years to come. Contact our company today and let us take care of your outdoor space!


